1.05 Setting up Users
Once you’ve followed the Setting up your Account and Setting up Clients tutorials, you are now ready to set up your Users.
It’s also helpful to review 1.04 User Access Types to better understand your project resources and for which type they best meet the criteria.
Note, before commencing this step, and all user profiles, be aware that they will receive an Invitation email (like you did) to join your Drive Lynx portal. Only complete this Tutorial if you have communicated your intentions for them to access Drive Lynx and the benefits it will offer them.
Note that you must check your License limits in your Account prior to inviting Users to your Drive Lynx Portal.
Click on Profile Set Up/Users
Firstly, click on the + NEW symbol in the right hand side of the top menu to add a new user.
Here’s the screen you’ll work from:
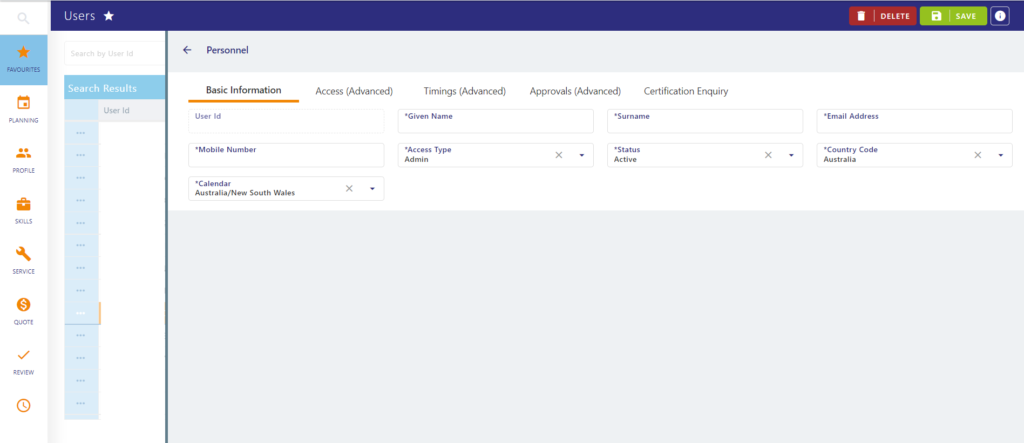
User ID will be auto-allocated.
Add Given name, Surname, email address, and mobile number.
Calendar (this is timezone and public holidays so the Admin and project manager users can see when the User is available to work)
Access type refers to the type of User (in most cases it will be the contractor or resource for the project)
Status (Active or Inactive). Users will not receive an invitation to your Drive Lynx portal until you have changed their status to Active. This allows for you to prepare their profile in advance.
Click on save and you are ready to upload a new user for your Project Plan.
Advanced options can be created at a later time.
Click SAVE to complete the User creation.
Advanced Settings
Access (Advanced)
See features in the example below:
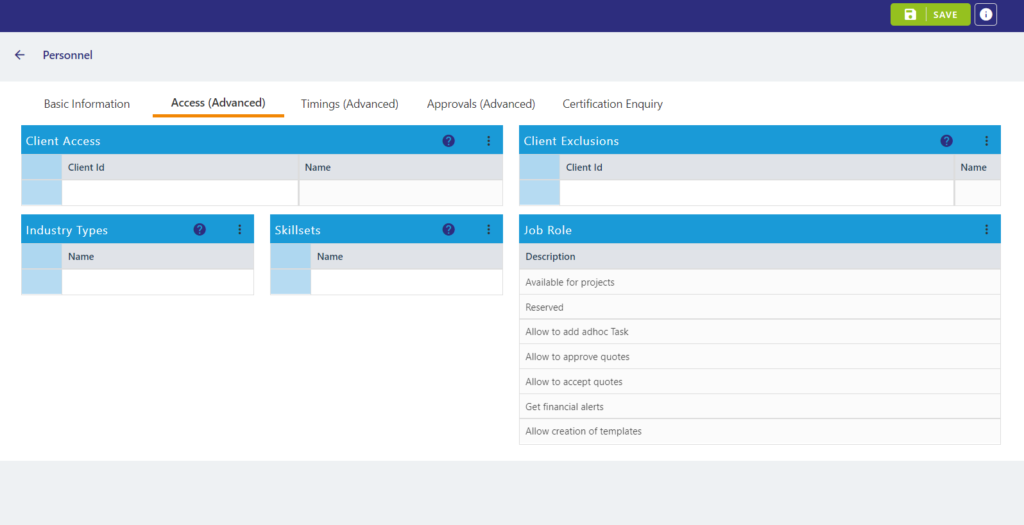
Client Access – Limit the User access to particular Client projects or exclude them from certain Client projects.
Allocate Industry Types and Skillsets that are suitable for the User (Visit Tutorial 2.06 and 2.03 to set up Industry Types and Skillsets, respectively).
Allocate Job Roles – what is the User going to be accessing in the system.
Timings (Advanced)
See features in the example below:
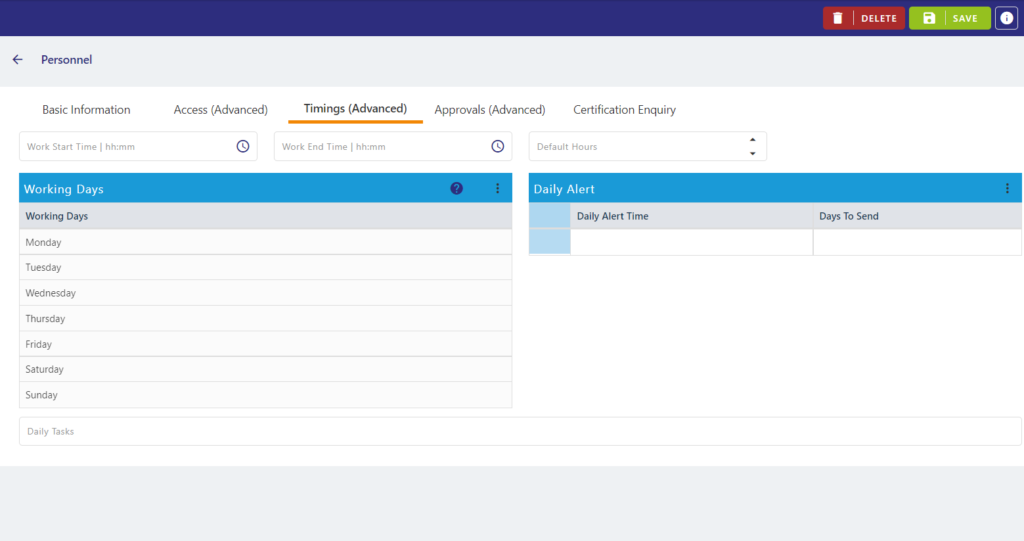
Timings establish your Users’ typical working week and when you’d like to time their Task Alerts (notifications).
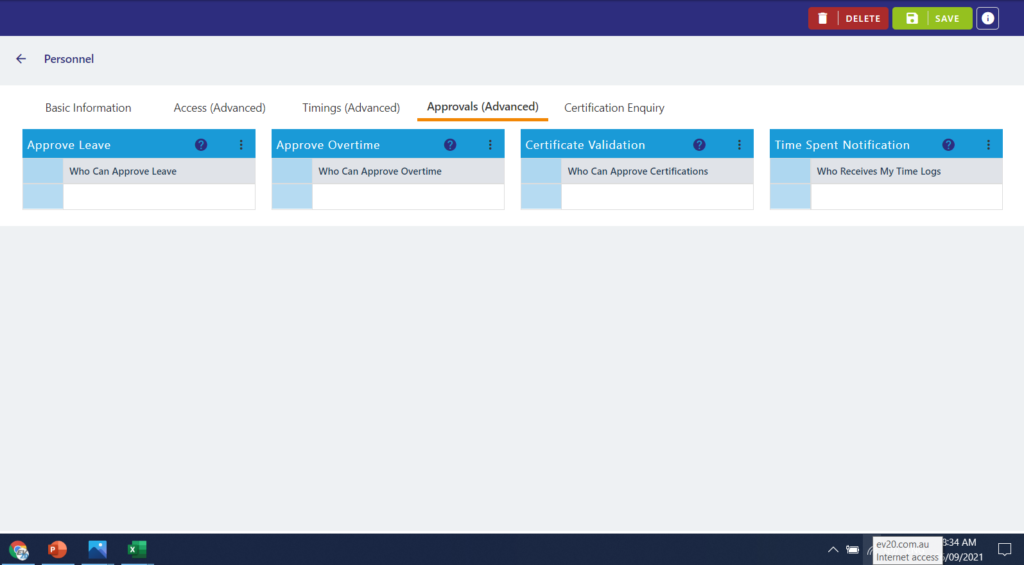
Approvals (Advanced)
Set Users with authority to approve various incoming User information such as overtime, certificates, leave and more.
VIew the options in the screen below:
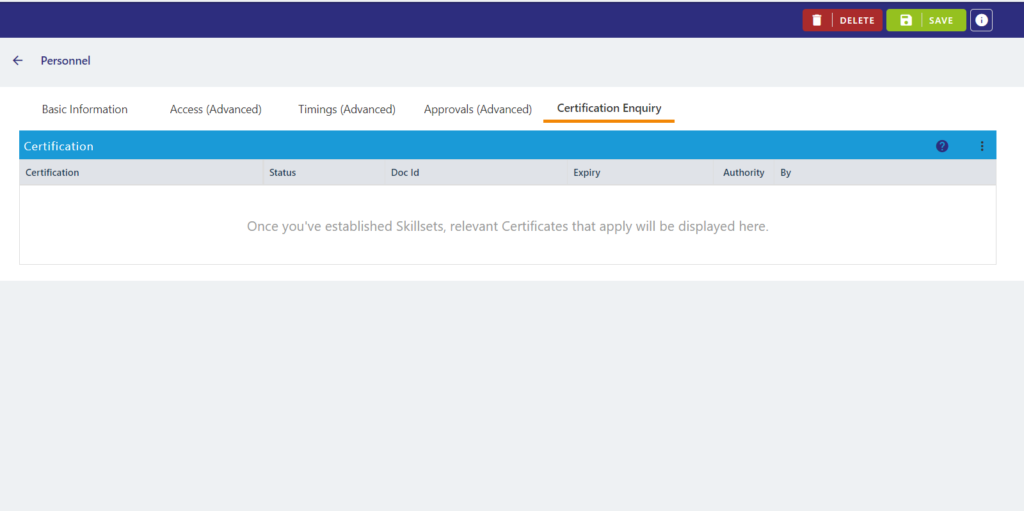
Advanced Certification
Users will have Certificates uploaded, proving their relevance and compliance to skills required for your project tasks. This below screen is where you will see their Certificate history, including when they expire, and when and who has reviewed them.
You’ve now completed a User profile. Don’t forget to request that Users download the mobile app for convenience and accessibility.